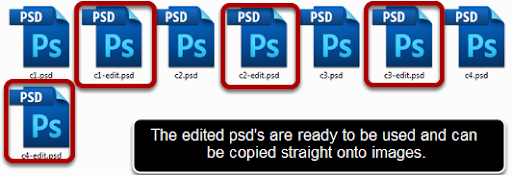
In the download I have included edited psd's which can be copied straight onto images. The other ones are original copies from images which need to be edited, this guide shows how to.
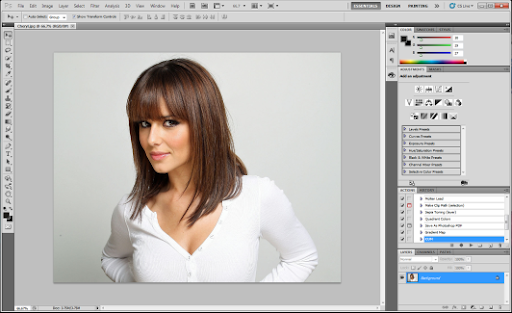
Step 1 - Open image to be edited
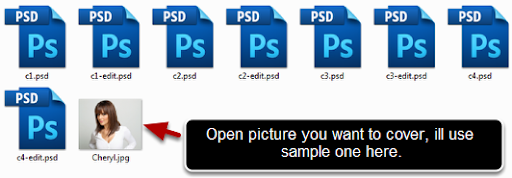
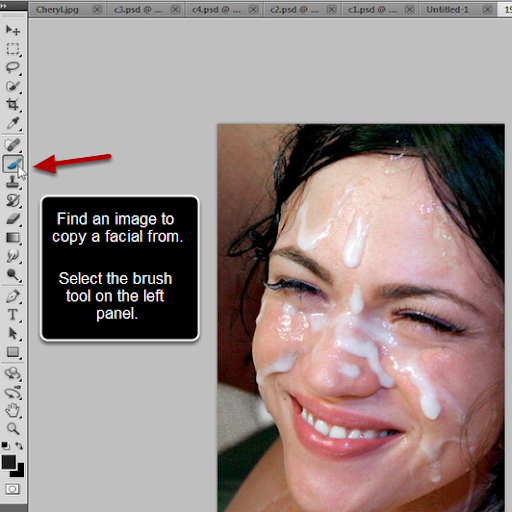
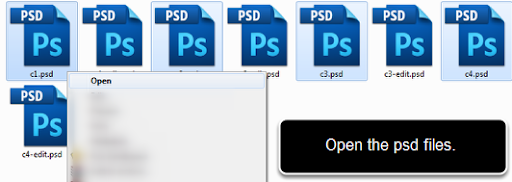
Step 2 - Open PSD files to be used
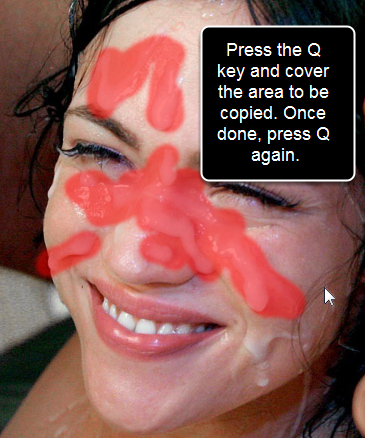
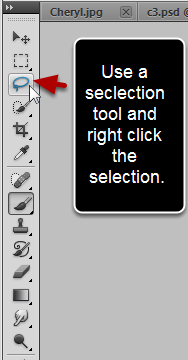
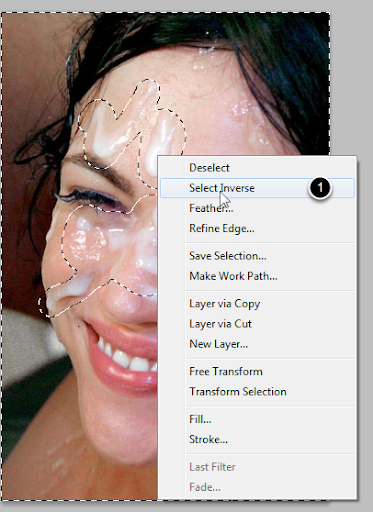
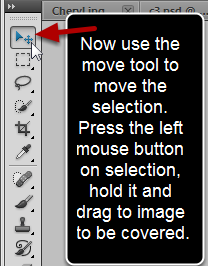
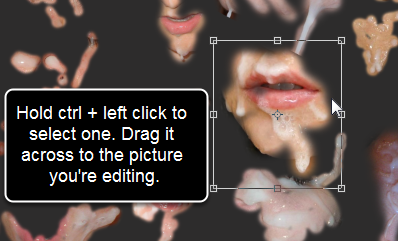
Step 3 - Find image you like from psd and select it and drag over to main image.
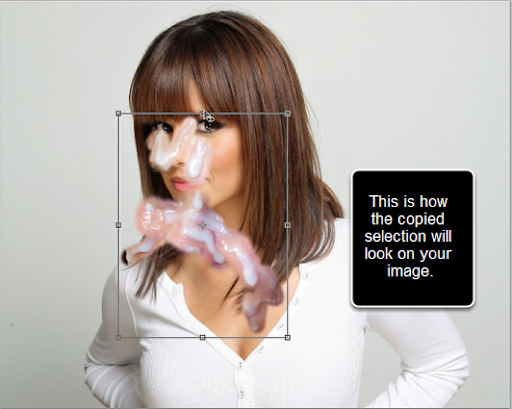
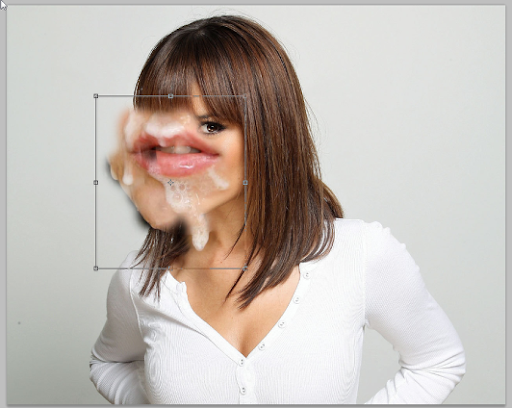
Step 4 - Result of moving
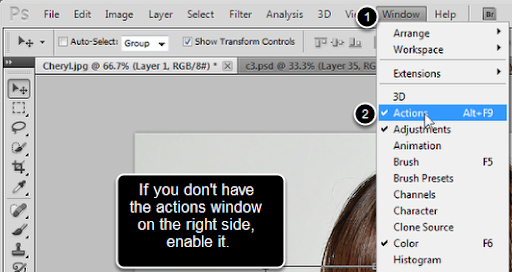
Step 5 - Enable action window if it's not already showing
Step 6 - Making an action to automate process

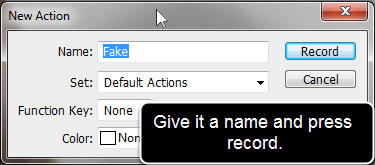
Step 7 - Name the action and start recording
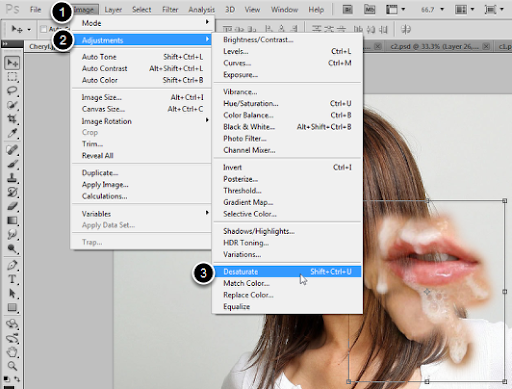
Step 8 - De saturate the selection
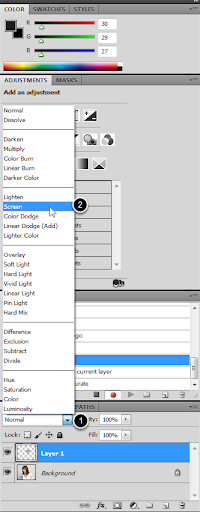
Step 9 - Set layer to screen mode
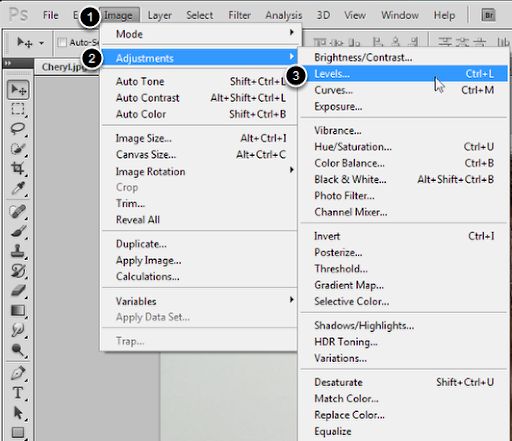
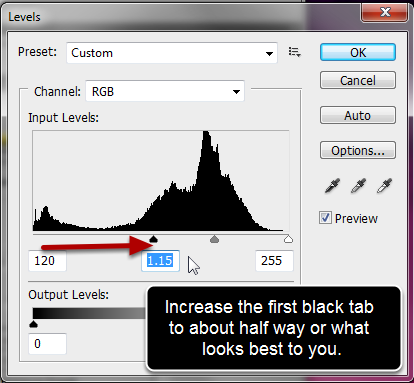
Step 10 - Adjust levels
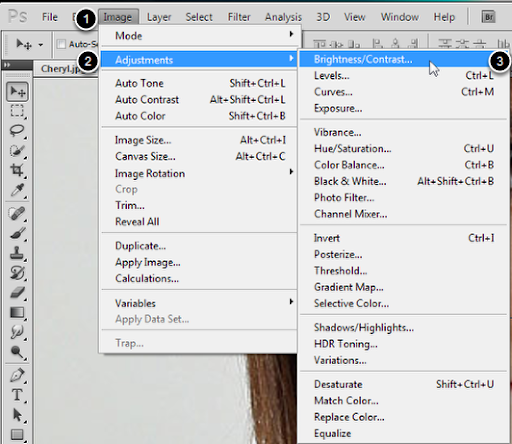
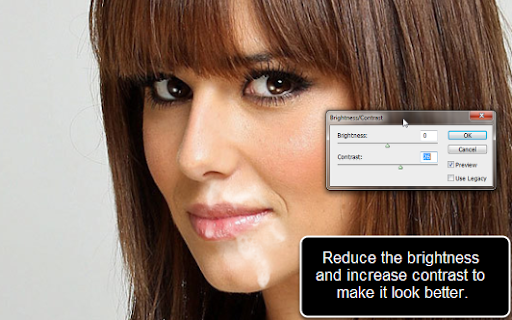
Step 11 - Adjust brightness / contrast
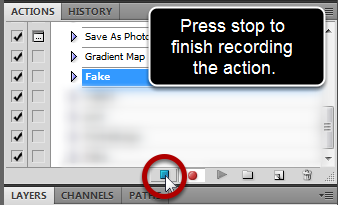
After this step, press stop on the recording straight away.
Step 12 - Finish the action recording
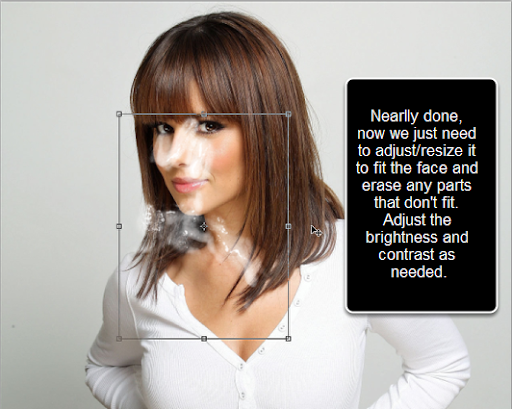
Step 13 - Selection might need tweaking with brightness / contrast controls to make it look natural.
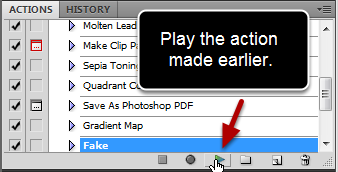
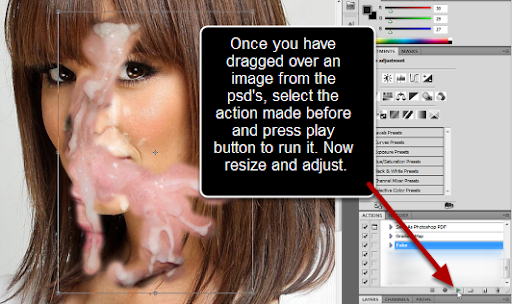
Now using any of the images from psd you can run the action and it will automatically do all of the steps just recorded.
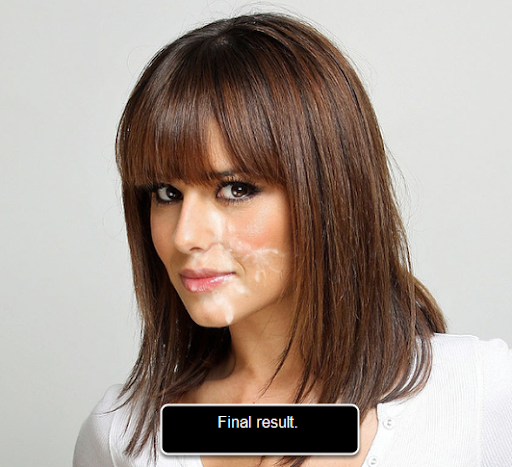
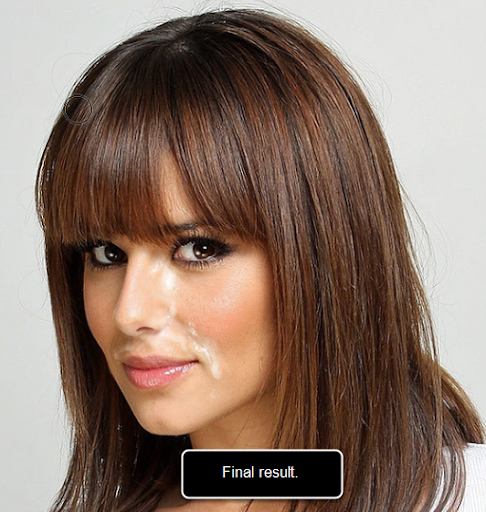
Result